Master the Process for Developing an App | Your Ultimate Guide
Table of Contents
Turning an app idea into a real, market-ready product is a journey. It’s a structured process that moves from that initial spark of an idea all the way to a polished app in the hands of your users. We're talking about a path that covers strategy and research, UI/UX design, development, rigorous testing, and finally, a strategic launch. Following this roadmap is what separates the apps that succeed from those that just... exist.
Your Blueprint for App Success
Alright, let's get into the practical, hands-on guide to building an app. Forget the high-level fluff; we're going to walk through what it actually takes to bring your vision to life. The first, and most critical, step is building a solid foundation. That means validating your core idea and doing some real-deal market research.
We'll dig into why defining a Minimum Viable Product (MVP) is your smartest move. It lets you launch faster, get your app into the wild, and gather feedback from actual users. This section lays the groundwork for everything that follows, from design and coding to testing and launch day. Think of it as your strategic playbook.
The Modern App Development Lifecycle
The app stores are crowded. That's no secret. With the number of app downloads projected to hit 299 billion in 2025 (up from 257 billion in 2023), you can't just wing it and hope for the best.
Consider this: the average person uses around 10 different apps every single day. To become one of those 10, you need a plan that’s laser-focused on keeping users engaged. If you want to dive deeper into the numbers, check out these mobile app download statistics.
A great idea is just the starting line. The real race is won through meticulous planning, user-focused design, and iterative improvement. Rushing to code without a solid plan is the quickest way to build an app nobody needs.
Understanding the different phases of development brings clarity to the whole process. It helps you manage your time, your budget, and everyone's expectations. Each stage builds on the last, creating a logical flow from a simple concept to a finished product.
Core Phases of App Development
Let's break down the journey into its core stages. Think of this as the high-level map of the entire project, where each phase has a specific purpose and its own set of critical tasks.
| Phase | Primary Goal | Key Activities |
|---|---|---|
| Strategy & Research | Validate the app idea and define its purpose. | Market research, competitor analysis, user persona creation, defining MVP scope. |
| UI/UX Design | Create an intuitive and visually appealing user interface. | Wireframing, creating mockups, building interactive prototypes, user flow mapping. |
| Development | Write the code and build the functional app. | Front-end (client-side) and back-end (server-side) coding, API integration. |
| Testing & QA | Ensure the app is bug-free, stable, and user-friendly. | Functional testing, usability testing, performance checks, security audits. |
| Launch & Iteration | Deploy the app and gather user feedback for improvements. | App store submission, marketing, monitoring analytics, planning future updates. |
This isn't just a one-and-done checklist. It’s a cycle. After you launch, the feedback you get from real users circles right back to the strategy phase. That’s how you start iterating, improving, and building the next, even better version of your app.
Validating Your Idea and Defining Scope
A brilliant idea is just the spark. The real work—and what separates successful apps from forgotten ones—is proving that people actually want what you’re planning to build. It's a truth many founders learn the hard way: skipping this validation step is a fast track to building something nobody uses.
Before a single line of code is written or a design is mocked up, you need a solid answer to one question: Does my app solve a real problem for a specific group of people? This isn't about polling your friends and family for encouragement. It’s about becoming a detective, hunting for hard evidence that a genuine need exists in the market.
This phase is all about shifting from "I think people want this" to "I know they do, and here's why."
Get to Know the Neighborhood: Market Research
Good market research is more than a few quick Google searches. You need to really understand the world your app is about to enter, and that starts with a deep dive into your competitors. Find out who’s already playing in your space, download their apps, and live in them for a few days.
What are they nailing? More importantly, where are they dropping the ball? Read their user reviews—the one-star and three-star ones are often goldmines, packed with user frustrations and wish-list features. These gaps are your openings. Take note of their pricing, the features they promote, and how they talk to their customers. You’re not looking to copy them, but to learn from their journey so you can find your own unique angle.
Seeing competition isn’t a reason to back down; it’s proof that a market exists. Your job isn't to be the only option, but to become a better or more focused option for a certain type of user.
Who Are You Building This For, Really?
Here’s a hard truth: if you try to build an app for everyone, you’ll end up building one for no one. You need to get laser-focused on your ideal user by creating a user persona—a fictional but realistic profile of the person who will get the most value from your app.
Don't be vague. Give them a name, a job, and real-world struggles. For instance, if you're creating a meal-planning app:
- Meet "Busy Brian": He's 35, a working parent juggling two kids and a demanding job.
- His Goal: He desperately wants to provide healthy, home-cooked meals for his family.
- His Pain Point: He has zero time for planning, defaults to expensive takeout, and feels guilty about it.
When you know "Brian" this well, every decision becomes clearer. From features to button colors, you can always ask, "What would Brian want?" The entire process for developing an app sharpens when you have a clear picture of who's on the other side of the screen.
Turning Feedback into a Smart MVP
With a clear picture of the market and your user, it's time to stop assuming and start asking. You need to gather direct feedback from people just like "Busy Brian."
- Surveys: Tools like SurveyMonkey or Google Forms are great for getting quantitative data from a wider audience. Ask about pricing, must-have features, and current habits.
- Interviews: This is where the magic happens. Sit down (even virtually) with a handful of people from your target demographic for one-on-one chats. Ask open-ended questions like, "Walk me through the last time you tried to plan your meals for the week." You'll uncover insights a survey could never provide.
The intel you gather here is what shapes your Minimum Viable Product (MVP). An MVP isn't a cheap or unfinished app; it's the simplest, most focused version that solves the core problem for your earliest users.
For Brian, an MVP might be a simple recipe generator and an automatic shopping list. It wouldn't include a social network for foodies or smart fridge integration—that can come later. This lean strategy is a core principle in great custom software development for startups, as it gets you to market faster so you can learn from real users.
Designing a User-Centric Experience
Once you've confirmed your app idea has legs, it's time to bring it into the real world. This is the design phase, where your concept starts to take a visual, tangible shape. But this isn't just about picking pretty colors and cool fonts. Great design is invisible; it guides users to their goals so effortlessly they barely notice the interface at all.
This is where the magic of User Experience (UX) and User Interface (UI) design happens. Think of UX as the overall feeling someone has when using your app—is it simple, logical, maybe even fun? The UI, on the other hand, is what they see and touch: the buttons, the icons, the layout. For an app to succeed, these two have to work together perfectly.
Mapping the User Journey
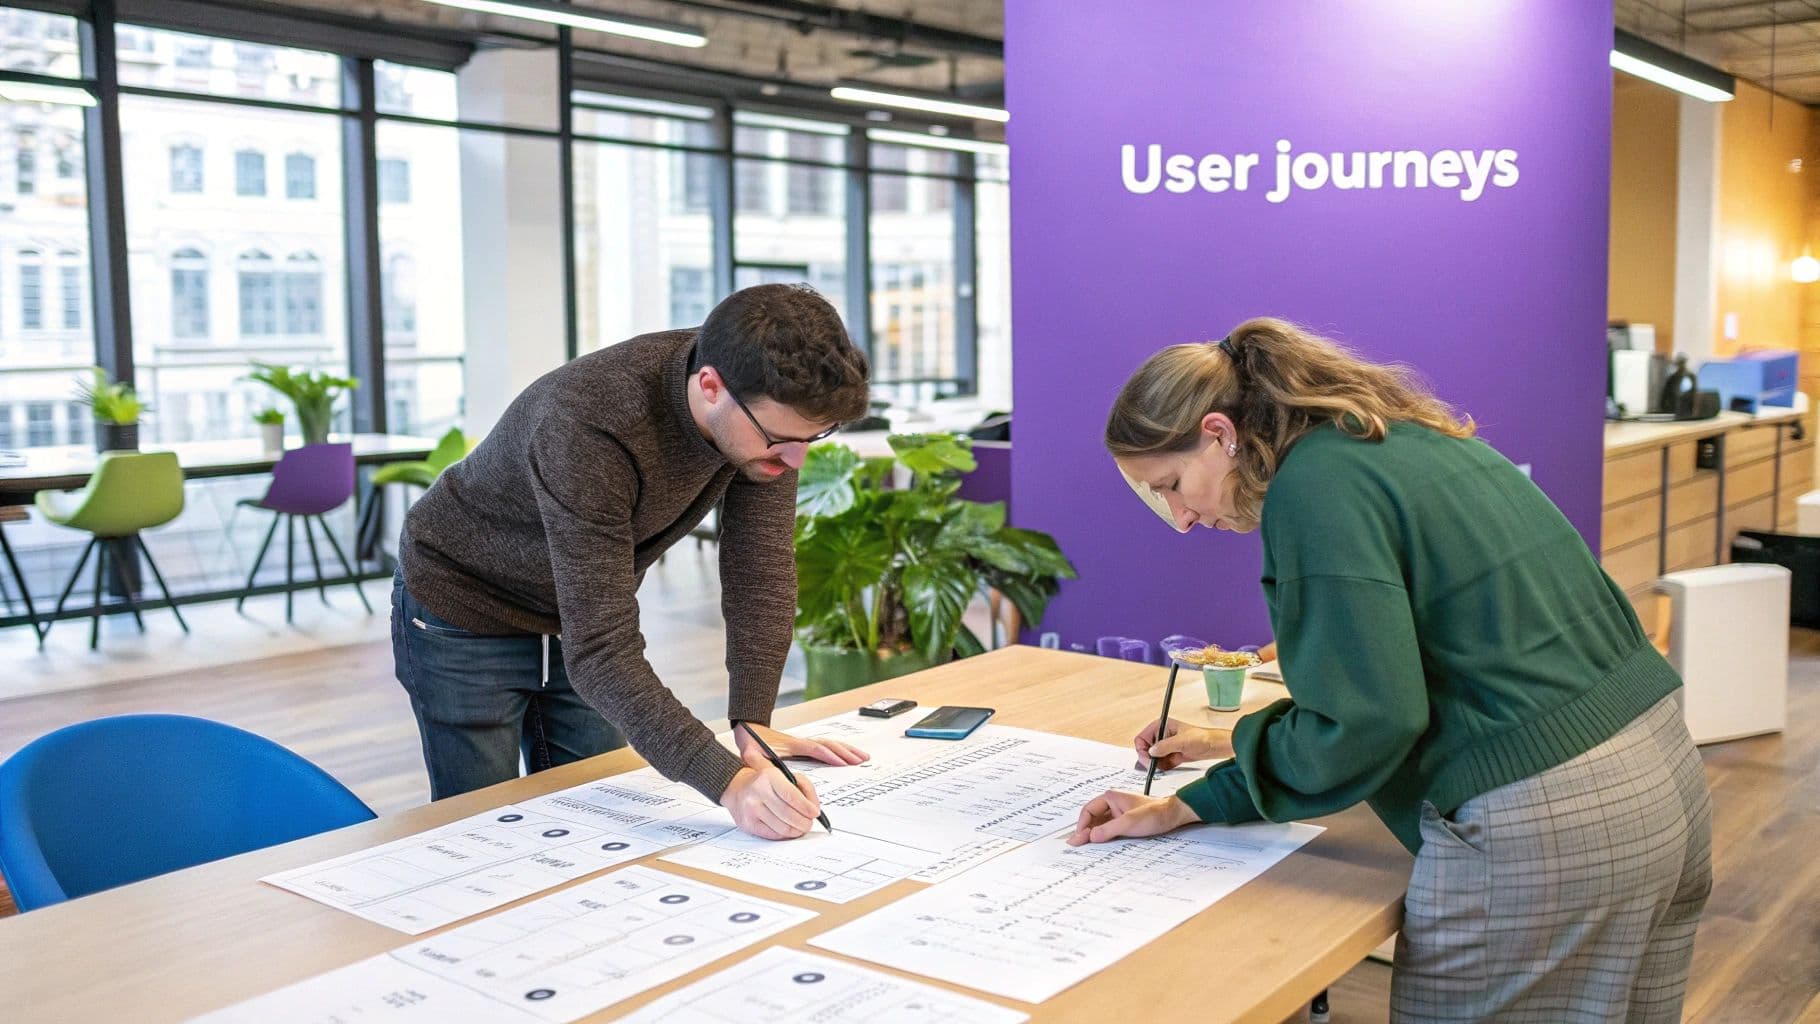
Before you even think about designing a screen, you need to understand how people will actually move through your app. This is where a user flow diagram is your best friend. It’s basically a flowchart that maps out every single path a user could take, from the moment they open the app to when they complete a goal, like creating an account or buying a product.
Creating these flows forces you to think through every possible scenario and potential dead-end. What if a user forgets their password? Where does the app take them after they add an item to their cart? Getting this map right from the start prevents confusion later and ensures your app feels intuitive, not frustrating.
For example, teams often use collaborative tools like Figma to lay out these visual blueprints together.
This kind of environment lets everyone see the entire app's structure at a glance, making it much easier to spot gaps in the user's journey.
From Blueprint to Visual Design
With your user flows locked in, you can start building the skeleton of your app with wireframes. These are simple, black-and-white layouts of each screen. The goal here is purely about structure—deciding where buttons, text, and images will live, without getting distracted by colors or branding just yet.
Wireframing is one of the most cost-effective things you can do. It allows for rapid iteration on layouts, making it incredibly easy to catch and fix structural issues early on. It's far cheaper to move a gray box on a wireframe than to recode a fully designed screen later.
Think of wireframes as the architectural blueprint for your app. You wouldn't build a house without one, and you shouldn't build an app without one either. It ensures everyone on the team agrees on the structure before the expensive work begins.
Once the wireframes get the green light, it's time for high-fidelity mockups. This is where the app's personality comes to life. Designers will apply your brand's color scheme, typography, and imagery to the wireframe structure, creating a pixel-perfect (but still static) picture of the final product. Polished visuals are more than just eye candy—studies show it can take as little as 50 milliseconds for a user to form an opinion about your app based on its looks alone.
Making It Feel Real with Prototypes
The last puzzle piece in the design phase is the interactive prototype. Using tools like Figma or Adobe XD, designers link those beautiful mockups together, making them clickable. This turns a collection of static images into a simulated app experience that feels surprisingly real.
Prototypes are crucial for a few big reasons:
- Test drive it early: You can get the prototype into the hands of real users and watch how they interact with it. Do they get lost? Can they easily find the main features?
- Get everyone on the same page: It gives founders, investors, and developers a concrete vision of the final product, eliminating costly misunderstandings down the line.
- A clear roadmap for developers: An interactive prototype shows coders exactly how animations, screen transitions, and user flows are supposed to work, which makes their job a whole lot easier.
Following this user-focused design process ensures you’re building more than just a functional app—you're creating an experience that people will actually enjoy using.
Choosing Your Tech Stack and Building the App
Alright, this is where the magic happens. All those wireframes, mockups, and user flows are about to become a real, working product. The development phase is all about turning those visual concepts into functional code.
But before a single line of code is written, you have to make one of the most important decisions in this whole journey: choosing your technology stack. This choice will have a ripple effect on your budget, timeline, app performance, and how easily you can scale down the road.
Don't get bogged down by the technical terms. At this stage, the decision really comes down to one big question: should you build a native app or use a cross-platform framework? Each has its own set of pros and cons, and the right call depends entirely on your project's goals.
Native vs. Cross-Platform Development
A native app is built specifically for one operating system. That means using languages like Swift or Objective-C for iOS, and Kotlin or Java for Android. The huge upside here is peak performance and reliability. Because the app is coded in the platform's "native tongue," it can tap directly into the device's hardware like the camera, GPS, or accelerometer. This translates to a faster, smoother user experience.
On the flip side, you have cross-platform frameworks like React Native or Flutter. These let you write your code once and deploy it on both iOS and Android from a single codebase. This approach can seriously reduce development time and cost, which is a massive win for startups. The trade-off? You might see slightly lower performance on resource-heavy tasks, and there can sometimes be a short delay in getting access to the very latest OS features.
Here's a quick table to help you compare the two paths:
Native vs Cross-Platform Development
Deciding between native and cross-platform is a classic fork-in-the-road moment. Native offers the best possible performance, while cross-platform offers speed and efficiency. The table below breaks down the key factors to help you figure out what's best for your MVP.
| Factor | Native (iOS/Android) | Cross-Platform (React Native/Flutter) |
|---|---|---|
| Performance | The absolute gold standard. Unbeatable speed and responsiveness. | Very good for most apps, but can struggle with graphically intense tasks. |
| Development Cost | Higher. You're essentially paying to build two separate apps. | Lower. One team, one codebase, less money spent. |
| Time to Market | Slower. Building two apps from the ground up takes time. | Faster. The "write once, deploy anywhere" model gets you to launch sooner. |
| Access to Device Features | Instant, seamless access to all native device hardware and APIs. | Good, but you might need to wait for a plugin or update for the newest OS features. |
Ultimately, the best choice is the one that aligns with your MVP’s core purpose and your available resources. There's no single right answer, only the right answer for your project.
Front-End and Back-End Explained
With that decision made, the actual building process is split into two worlds: front-end and back-end development. I find it helpful to think of it like a restaurant.
- The Front-End: This is the dining room. It’s everything your user sees, touches, and interacts with—the buttons, the layout, the menus, the animations. It's the user interface (UI) you spent so much time designing.
- The Back-End: This is the kitchen. It’s the behind-the-scenes engine—the servers, databases, and application logic. This is where user accounts are managed, data is stored, and information is processed before being sent back to the front-end.
A great app experience happens when these two work together flawlessly. A solid back-end keeps your app fast, secure, and ready to grow, while a polished front-end makes it a joy to use.
Managing the Development Workflow
Whether you've hired an agency or are wrangling your own team, you need an efficient way to manage the work. These days, most teams swear by an Agile development methodology. Instead of trying to build the entire app in one go (a recipe for disaster), the work is broken into short, focused cycles called "sprints."
This iterative process is perfect for building a Minimum Viable Product. If you're not familiar with the concept, it's worth reading up on the benefits of a Minimum Viable Product and how it helps you learn faster with less risk.
The real goal isn't just to ship code; it's to build a product that solves a problem and delivers value. Agile keeps you flexible, allowing you to react to early user feedback without derailing the whole project.
Testing is a huge part of this. Instead of saving it all for the end, testing happens throughout each sprint. This helps catch bugs early when they're cheaper and easier to fix. As you can see below, there's a big difference between manual and automated testing.
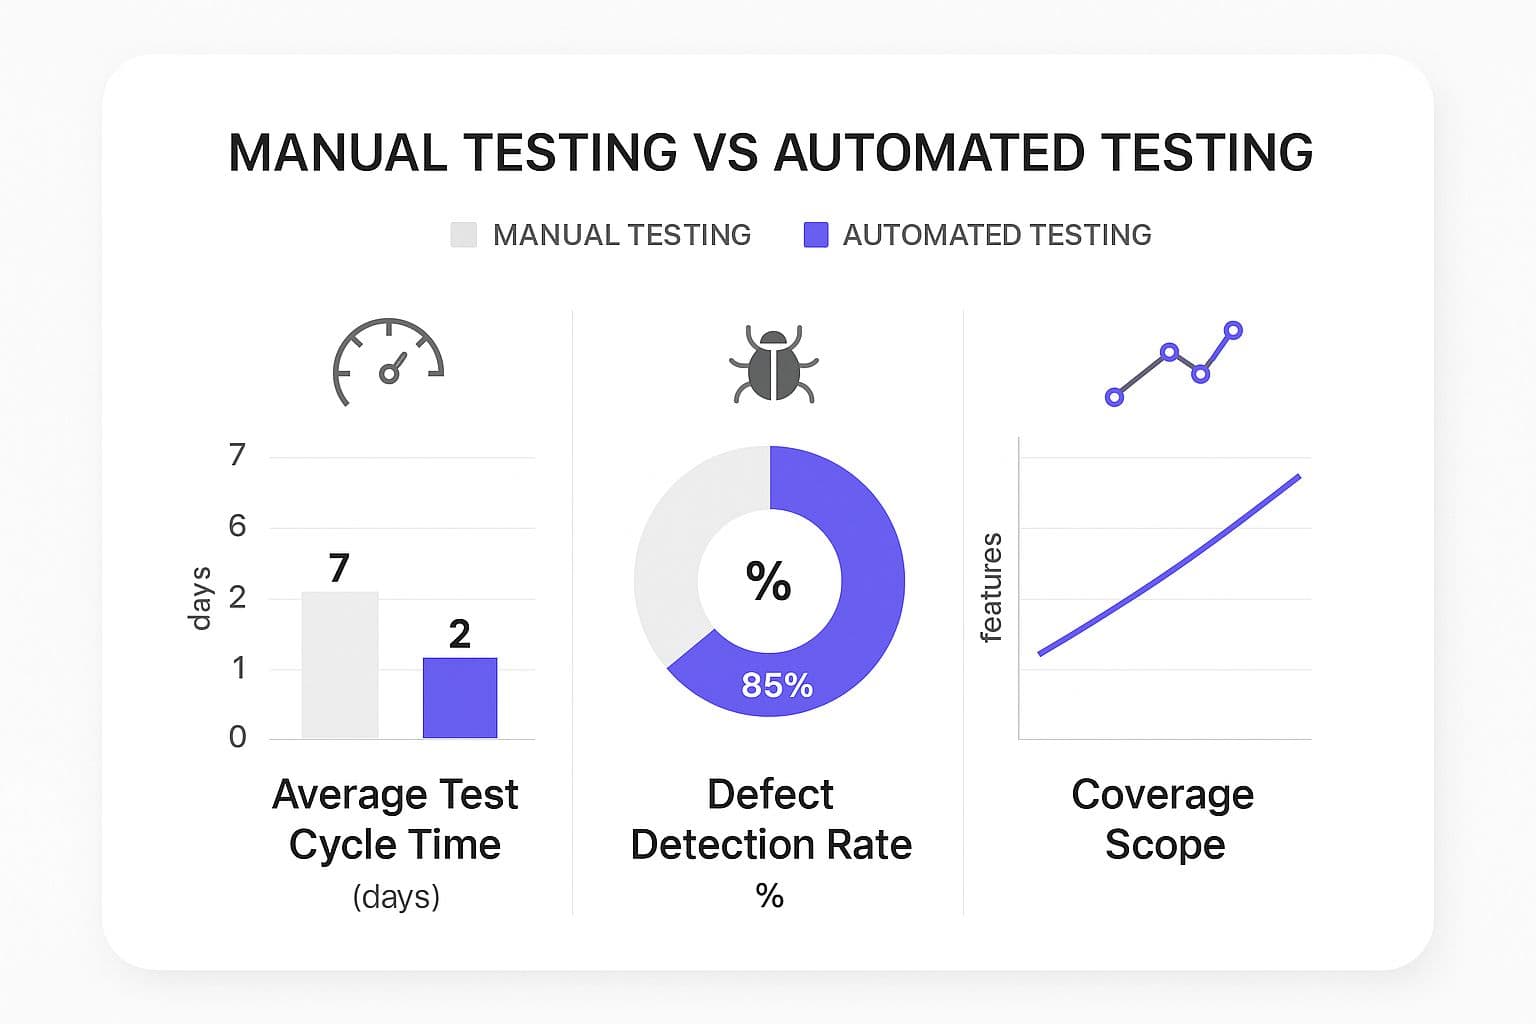
The data is clear: automated testing dramatically cuts down test cycles and finds more defects, making it an essential part of any modern development process.
Finally, start thinking about monetization now, not later. By 2025, the mobile app market is projected to be worth a staggering $935 billion. A huge chunk of that—nearly 40%—will come from in-app purchases and subscriptions. If you build your payment model into the app during development, it will feel like a natural part of the experience rather than a clunky add-on.
Testing, Launching, and Gathering Feedback

The development work is done, and your app is finally starting to feel real. It's incredibly tempting to rush across the finish line at this point, but this next phase—testing—is what truly separates a successful launch from a buggy disaster.
Rigorous Quality Assurance (QA) isn't just about finding crashes. It's about making sure the experience you painstakingly designed is the one users actually get. This is your last chance to find and fix the problems before your app meets the real world.
A Multi-Layered Testing Approach
Good QA isn’t a single step. It's a series of different tests, each designed to scrutinize a specific part of your application. Think of it as a quality control gauntlet that validates everything from core functionality to how a user feels when they use your app.
A solid strategy should include a few key testing types:
- Functional Testing: This is the nuts and bolts. Does each feature do what it's supposed to do? When someone taps "Add to Cart," does the item actually show up in the cart? This means clicking every single button, filling out every form, and following every link to confirm they work flawlessly.
- Usability Testing: Here's where you get out of your own head. Bring in real people who have never seen your app and just watch them try to use it. Can they figure out how to sign up on their own? Do they get stuck trying to complete a core task? Their confusion is pure gold, revealing design flaws you're simply too close to the project to see.
- Performance Testing: How does your app hold up under pressure? Performance testing checks for things like excessive battery drain, slow loading speeds, and overall stability. An app that crashes or lags, even once, can cause 71% of users to uninstall it immediately. This step makes sure your app is snappy and reliable from the get-go.
For a much deeper dive into building a robust QA plan, you might find our guide on software testing best practices helpful.
Navigating the App Store Submission Process
Once you’ve squashed the bugs and you're confident in your app's stability, it's time for the big show. Submitting to the Apple App Store and Google Play Store is a process in itself, and each has its own rulebook you need to follow to the letter.
Getting your app approved is not a given. Apple, in particular, has a reputation for its strict review process. Meticulously following their guidelines isn't just a suggestion; it's a requirement for a smooth launch.
You'll need to get a few key assets and pieces of information ready for your store listings:
- Gather Your Metadata: This is all the text—your app's name, a compelling description, keywords people will use to find you, and your privacy policy.
- Create Visuals: You'll need a high-quality app icon, feature graphics, and a set of screenshots that show your app’s best features in action. Make them look good!
- Complete the Submission Forms: Each platform has a developer portal (App Store Connect for Apple, Google Play Console for Android) where you'll upload your app's build file and fill out all the necessary details.
Be prepared for a review period that can take anywhere from a few hours to several days. If your app gets rejected, don't panic. They'll tell you why. Just fix the issue and resubmit.
The Real Work Begins After Launch
Hitting "publish" isn't the end of the journey; it’s the start of a whole new one. The moment your app is live, you have an incredible opportunity to learn from real user behavior. Your goal now is to establish a continuous feedback loop that will guide every future update.
Start by tracking key metrics to understand how people are actually using your app. Analytics tools can show you:
- User Engagement: How many daily and monthly active users do you have? How long do they stick around in each session?
- Retention Rate: What percentage of users come back after their first day, week, or month? This is a huge indicator of value.
- Feature Adoption: Which features are people using the most? More importantly, which ones are being completely ignored?
This quantitative data tells you what is happening. To understand why, you need to get qualitative feedback. Encourage users to share their thoughts through in-app feedback forms, surveys, and by keeping a close eye on app store reviews. This mix of hard data and direct feedback is the blueprint for your first update and every single one that follows.
Answering Your Burning Questions About App Development
Even with the best roadmap, the path from idea to app is full of questions. It’s natural to have a million things running through your mind about how long it will all take, what the bill will look like, and what on earth you’re supposed to do once the app is actually live.
Let's cut through the noise and tackle the most common questions I hear from founders. Think of this as the practical, no-fluff guide to the "what-ifs" and "how-much" of building a digital product.
How Much Does It Cost to Build an App?
This is the big one, isn't it? The honest-to-goodness answer is: it depends. Building an app is a lot like building a house. Are you building a simple one-room cabin or a custom-designed mansion? The features, complexity, and team you choose will massively influence the final number.
For a simple app with core functionality, you might be looking at a range of $10,000 to $50,000. But for a more complex beast with custom UI/UX, heavy-duty backend infrastructure, and multiple integrations, the budget can easily soar past $150,000.
What drives these costs? A few key things:
- Platform Choice: Are you building just for iPhones (iOS) or for Android too? Creating two separate native apps is almost always more expensive than using a single, cross-platform framework.
- The Feature List: Every single feature adds to the timeline and budget. A basic user login is one level of effort; a real-time video chat function is a completely different ballgame.
- Design Complexity: If you want slick, custom animations and a deeply branded user interface, you'll need more time from talented (and often expensive) designers.
- Third-Party Integrations: Need to connect to a payment processor like Stripe or pull in map data from Google? Each of these connections, called APIs, adds development time.
Here's a piece of hard-won advice: don't just hunt for the lowest price. Focus on finding the best value. Paying a bit more upfront for a well-architected, scalable MVP can save you a fortune in bug fixes and complete rewrites down the road.
What’s a Realistic Timeline for App Development?
Just like cost, the timeline is a direct reflection of your app's complexity. A lean, focused MVP can sometimes be brought to life in as little as two to three months. On the other hand, a large-scale, feature-heavy application could easily take anywhere from six months to a year, or even more.
A pretty standard MVP timeline could be broken down like this:
- Discovery & Design (Weeks 1-4): This is where you’re doing your homework—market research, mapping out user flows (wireframing), and creating the final visual designs (mockups).
- Development (Weeks 5-12): The heads-down coding phase. This is where your developers bring the designs to life, building both what the user sees (front-end) and the server-side logic that powers it (back-end).
- Testing & Deployment (Weeks 13-16): Time for some serious quality assurance. This involves hunting down bugs, fixing them, and getting everything ready for submission to the app stores.
Keep in mind, this is a simplified model. The single best way to get an accurate timeline is to have an incredibly clear, well-defined scope for your MVP. The more specific you are about what you need to build, the more accurate your development team can be with their estimates.
Do I Need to Know How to Code?
Not at all. In fact, some of the most successful founders I’ve met are non-technical. Your superpower isn't writing code; it's understanding your customer, defining the problem you're solving, and steering the ship.
Your job is to clearly and passionately communicate your vision to your technical team—whether that’s an in-house developer, a freelancer, or an agency partner. A great tech partner acts as your translator, turning your business goals into lines of code. They handle the "how," freeing you up to focus on the "why."
What Happens After the App Is Launched?
Getting your app into the App Store isn't the finish line. It's the starting gun. The post-launch phase is where the real work of building a business begins. Your focus has to pivot from building the product to growing and improving it with real-world feedback.
Right away, your attention should shift to these key areas:
- Marketing & User Acquisition: An amazing app that nobody knows about is just a passion project. You need a solid plan to get it in front of the right people.
- Monitoring & Analytics: You need to become obsessed with the data. Track user behavior, crash reports, and key metrics to understand what people are actually doing in your app.
- Gathering User Feedback: Actively ask for reviews, emails, and any feedback you can get. This is gold. It tells you what to fix and what to build next.
- Planning V2 (and V3, and V4...): Use all that data and feedback to create a roadmap for future updates.
The name of the game is continuous iteration. The most successful apps are never "done." They are constantly evolving to meet the needs of their users and stay ahead of the market.
Feeling ready to turn your app idea into a tangible product without getting lost in the process? At Iglu Digital, we specialize in building and launching market-ready MVPs for a price agreed before a line of code is written. We'll help you validate your vision and get your app into the hands of real users faster. Start building your MVP with us today.